Excel rows to columns transpose
What is excel transpose function
Excel transpose function is a very useful functions in excel. It is used to switch rows to columns or excel columns to rows. In our regular excel use, we usually come across situations where we need to change excel columns to rows or rows to columns to make calculations easier or to visualize data in excel. Let’s learn how to transpose excel rows to columns.
Method 1: Transpose Data with Paste Special Command
In this method, we will first copy the data that we wanted to transpose which is in rows. After copying the data we will select any cell where we wanted to transpose the data. Then we will go to Home Tab in excel sheet then click on Paste option. In this option, we will find Transpose option. After clicking on this option our data set will get transposed from rows to columns. We can see this in the below image.
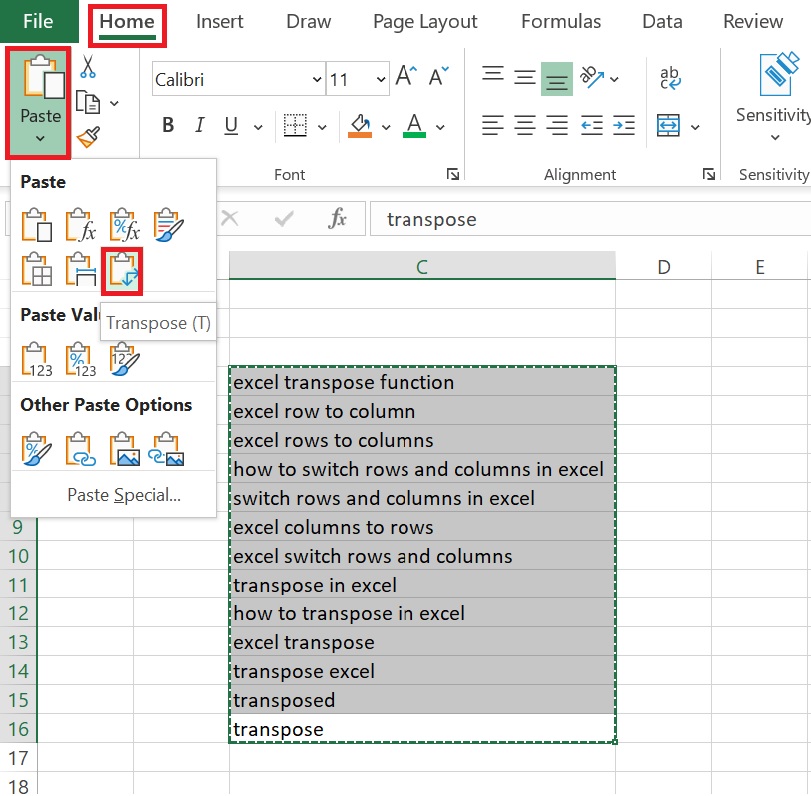
We can use it differently also after when we copy the data we will select a cell where we wanted our data. After that, we will right-click on the cell. A new floating box will come as shown below.
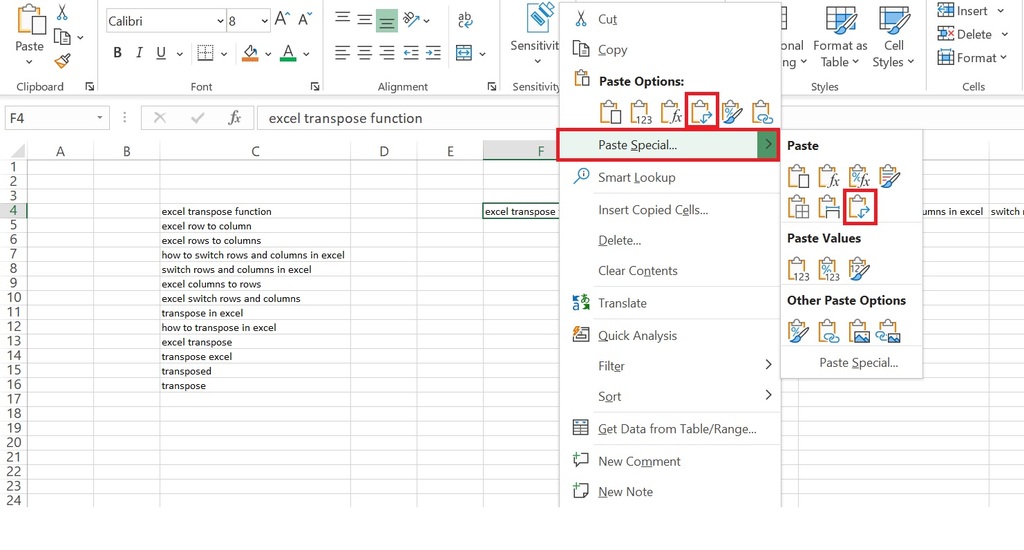
Here we will find two options first in Paste Option which is highlighted in red square and the second is in Special Paste option which is also highlighted in the square. After clicking on the option our data will get transposed.
Method 2: By using excel TRANSPOSE Function
Microsoft Excel provides a function to transpose data. Let’s understand its Syntax.
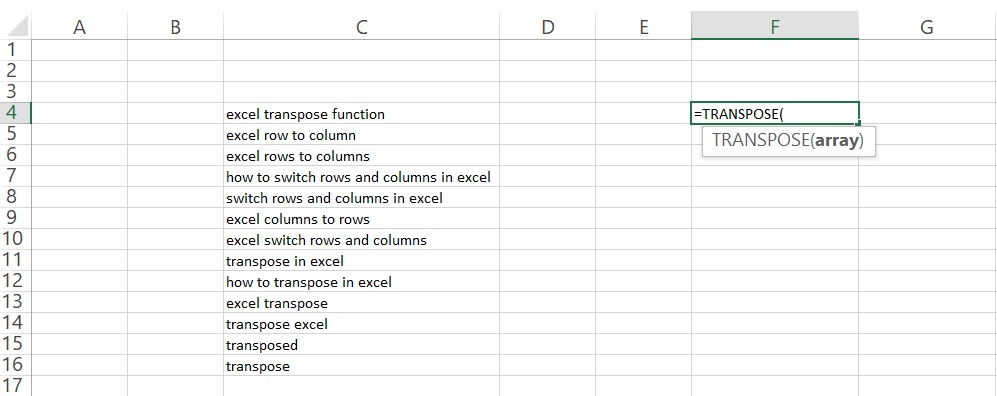
The Syntax for transpose function is very self-explanatory. It asks for an array that needs to transpose. It automatically detects excel rows to columns or excel columns to rows.
Method 3: Transpose Data with Power Query
To transpose excel row to column with power query we will first make our dataset an Excel Table. To make our dataset a table we will first go to Data Tab then choose From Table/Range as illustrated in excel.
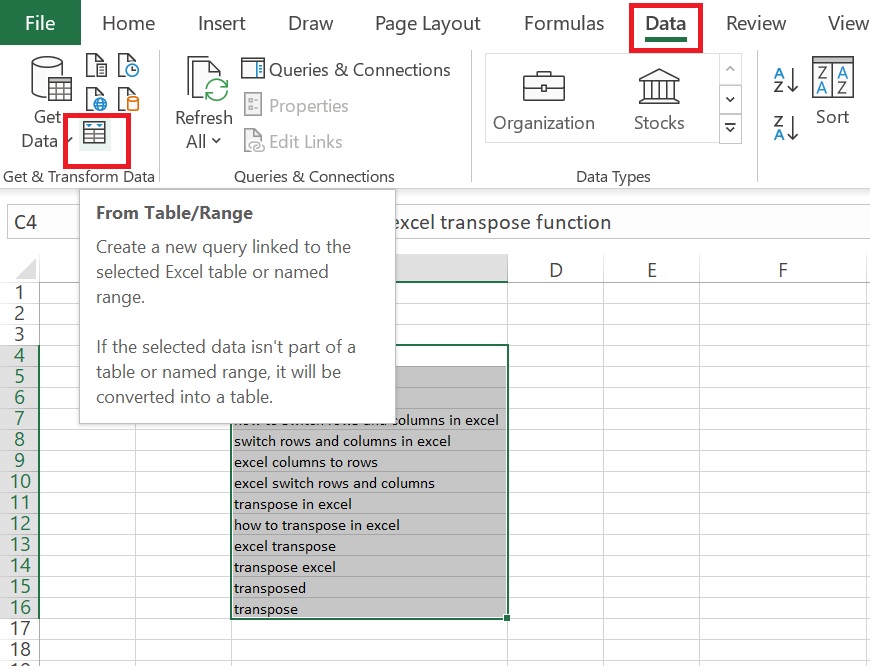
After clicking on this option we will get a box that will ask for a range of data and if we have a header of the dataset.
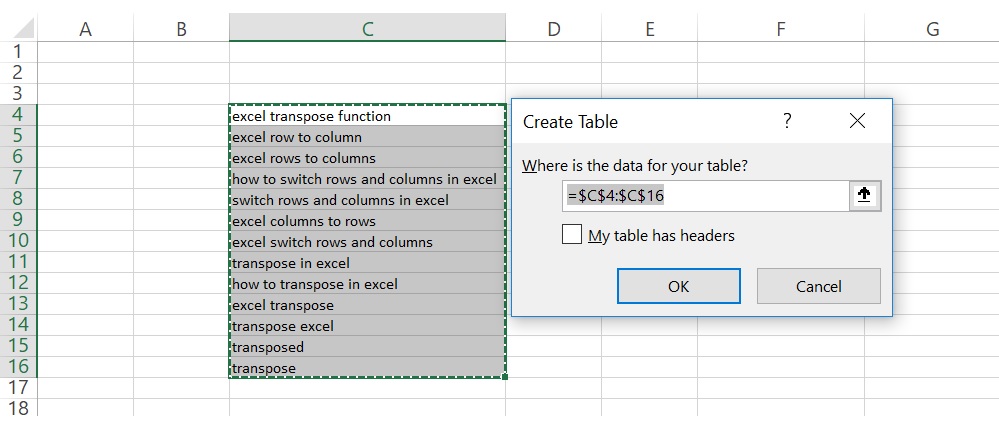
After clicking on this option we will get Power Query Editor box. You can read about excel Power Query from the link. In this editor, we will go to Transform tab and then will click on Transpose as shown in the below image.
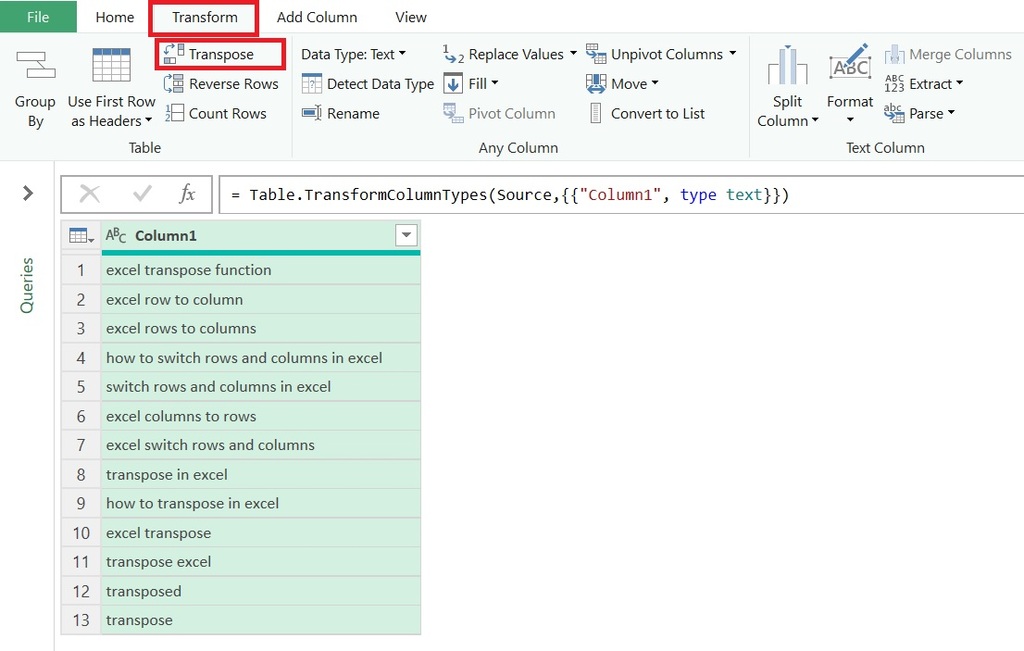
After clicking this option our data will switch from rows to columns. After that, we will go to Home tab where we can see the first option as Close & Load. It has two options to select, first Close & Load and second Close and Load To. We will choose the options as per our requirements. Finally, data got transpose from rows to columns.
That’s is all for this how to switch rows and columns in excel. We will meet again with some new article or topic.
You can watch the below video for more clarification on this. It would be really very helpful.
You can read more about how to transpose in excel from the below articles.
Pingback: Flex Applications for Excel – mobile phone experts Ipswich